Flyout Menu
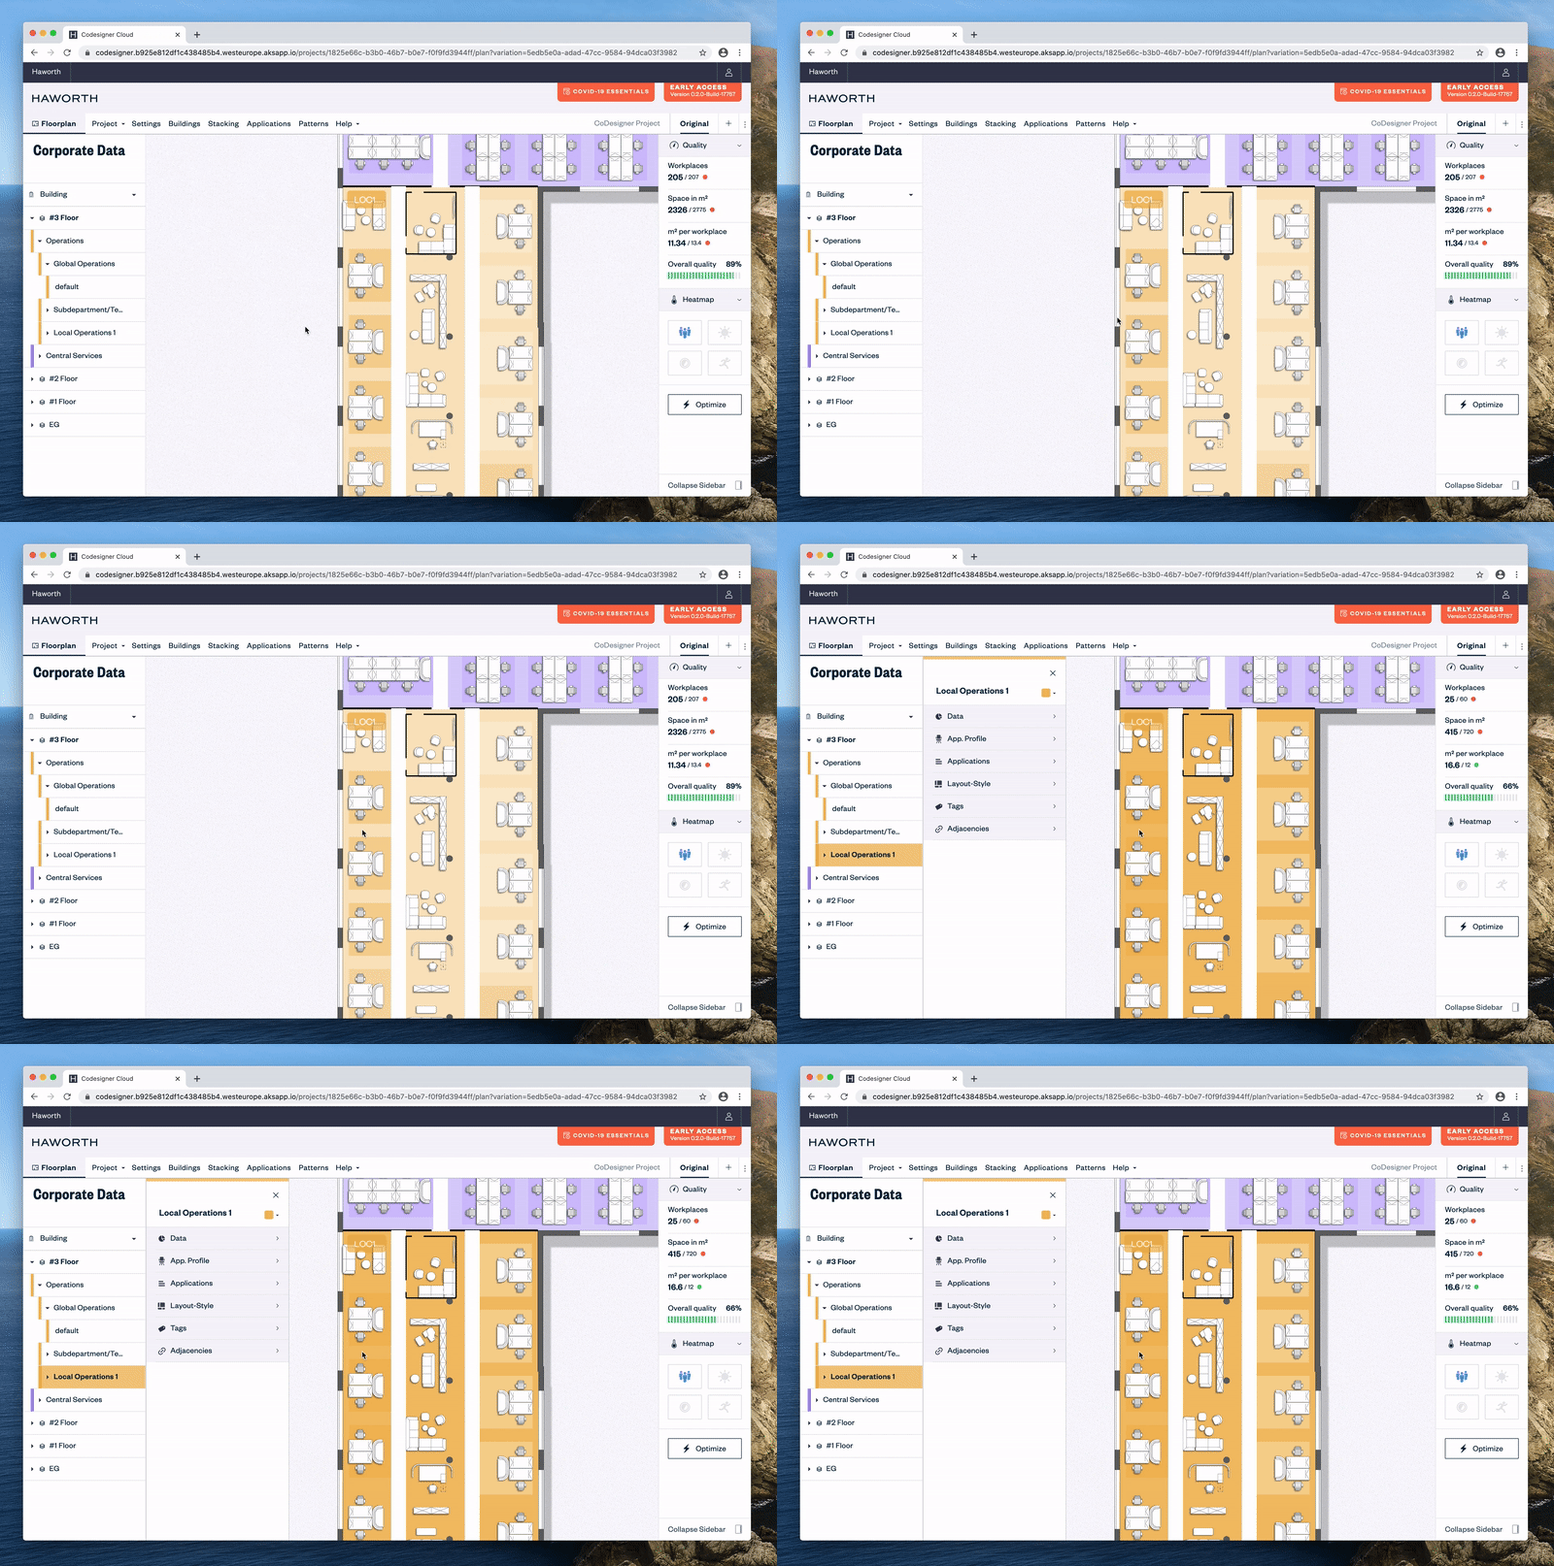
In the flyout menu you’ll find settings for the Subdepartments and Teams assigned to each floor. These settings partly correspond to those in the Settings section, but offer additional possibilities to influence the floorplan. Which settings are available depending on your selection and how you use the flyout menu is shown below.
How to open and close the flyout menu
To open the flyout menu, select a Subdepartment or Team in the floor plan or sidebar by simply clicking on it.
To close the flyout menu again, click either on the close icon or in the canvas somewhere next to the map to deselect the Subdepartment or Team.
Overview
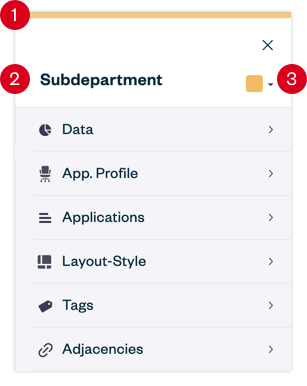
1) Color Indicator
At the top of the flyout menu you can see the color indicator. The color of it corresponds to the color you have given to the selected item via the imported xls-list or in Settings under Corporate Data. The color refers to either the selected Subdepartment or Team.
2) Subdepartment/Team Name
Further down you’ll find the name of the selected item. This way you always have control over which settings of which item you are going to change. The displayed name refers to either the selected Subdepartment or Team.
3) Color Picker
Next to the name you can change the color of the item. This works in the same way as under Corporate Data in Settings: Click on the color to assign a new one. The changed color will be visible in the floorplan, the sidebar and the color indicator in the flyout menu. The color picker works for either the selected Subdepartment or Team.
Subdepartments
If you have selected a Subdepartment, the following infos and settings are available:
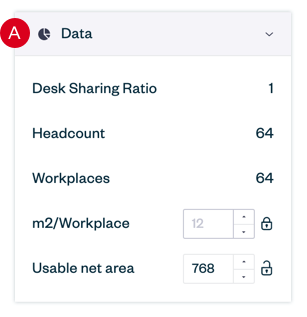
A) Data
Data is equivalent to Corporate Data in Settings. In the flyout menu the values for Desk Sharing Ratio, the number of planned headcount and workplaces, the defined squaremeter per workplace and the usable net area of the selected Subdepartment are displayed. The values of sqm per workplace or usable net area can be edited or locked.
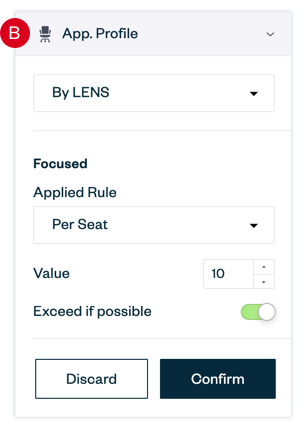
B) Application Profile
Under Application Profiles in the flyout menu you’ll find the same setting options as under Settings: You can set which Application Profile should be used, define which rule (Number of Units, Number of Seats, Headcount per Unit or Headcount per Seat) should be applied with which value and determine whether Exceed if possible should be activated. Read more
If you change the settings in the flyout menu you must confirm them to take effect. The buttons to cancel or confirm your action can be found at the bottom of the tab.
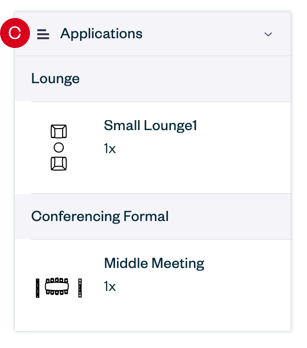
C) Applications
If you open this tab you’ll get a complete list of applications that are used in the selected subdepartment. The list is sorted by Type of Workplaces, shows you a preview and the exact number of the respective application.
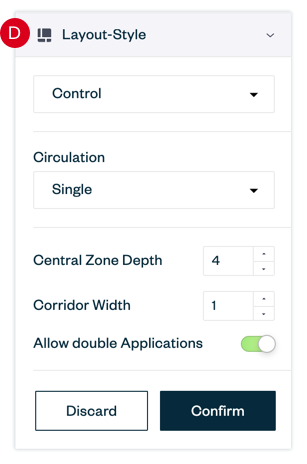
D) Layout Styles
Layout Styles is equivalent to Layout Styles under Settings. You can change the style of the subdepartment, set the circulation, define the Central Zone Depth or Corridor Width and whether double the number of the same application should be allowed. Read more
To make your changes effective, you must confirm them at the bottom of the tab.
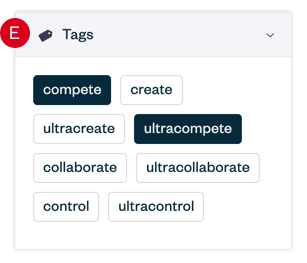
E) Tags
The tag function is particularly used for assigning the Applications to the Subdepartments in the floorplan. It controls the automated selection of the best fitting Application by CoDesigner, in order to optimize the floor space usage. The tags that are available in the flyout menu are created in the Application Builder and can be assigned individually to the applications. If you now assign these tags to the Subdepartments in the flyout menu, the Subdepartment will be provided with Applications that use the same tag. This way you can influence which Applications should be used in each Subdepartment.
Simply click on the desired tag to assign it.
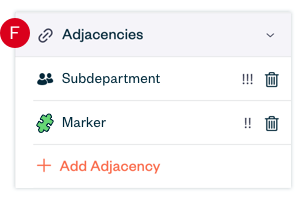
F) Adjacencies
Adjacencies are used to create connections between particular Subdepartments to Markers or other Subdepartments in order to place them proximate to each other. To create a new Adjacency from the selected Subdepartment to another one or a marker, open the tab and click on the button “Add Adjacency”. This will open a new window where you can select the desired subdepartment or marker and set the priority level of the connection.
New or already created Adjacencies are displayed under the button “Add Adjacency”. To delete the Adjacency or change the priority you can use the buttons next to it.
Teams
If you have selected a Team, the following infos and settings are available:
a) Data
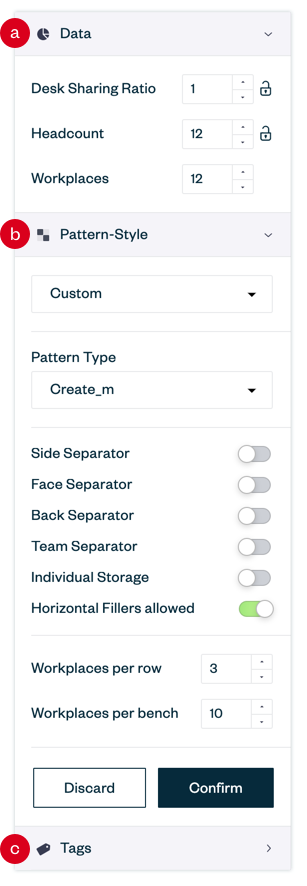
Data is equivalent to Corporate Data in Settings. In the flyout menu the values for Desk Sharing Ratio, the number of planned headcount and workplaces of the selected Team can be edited or locked.
b) Pattern Style
Under Pattern Style in the flyout menu you’ll find the same setting options as under Settings: You can specify which Pattern Style and corresponding Pattern Type should be used, whether separator, individual storage or filler should be active, and define how many Workplaces should be created per row and per bench. Just like you do it under Pattern Styles in Settings. Read more
If you change the settings in the flyout menu you must confirm them to take effect. The buttons to cancel or confirm your action can be found at the bottom of the tab.
c) Tags
The tag function for Teams is identical to that for Subdepartments.
