Toolbox
CoDesigner’s Toolbox is a context-sensitive tool menu and can be accessed by right-clicking on various objects. This means that the available tools always refer to the objects you right-clicked on. We will show you an overview of the objects that can be edited or created using the toolbox.
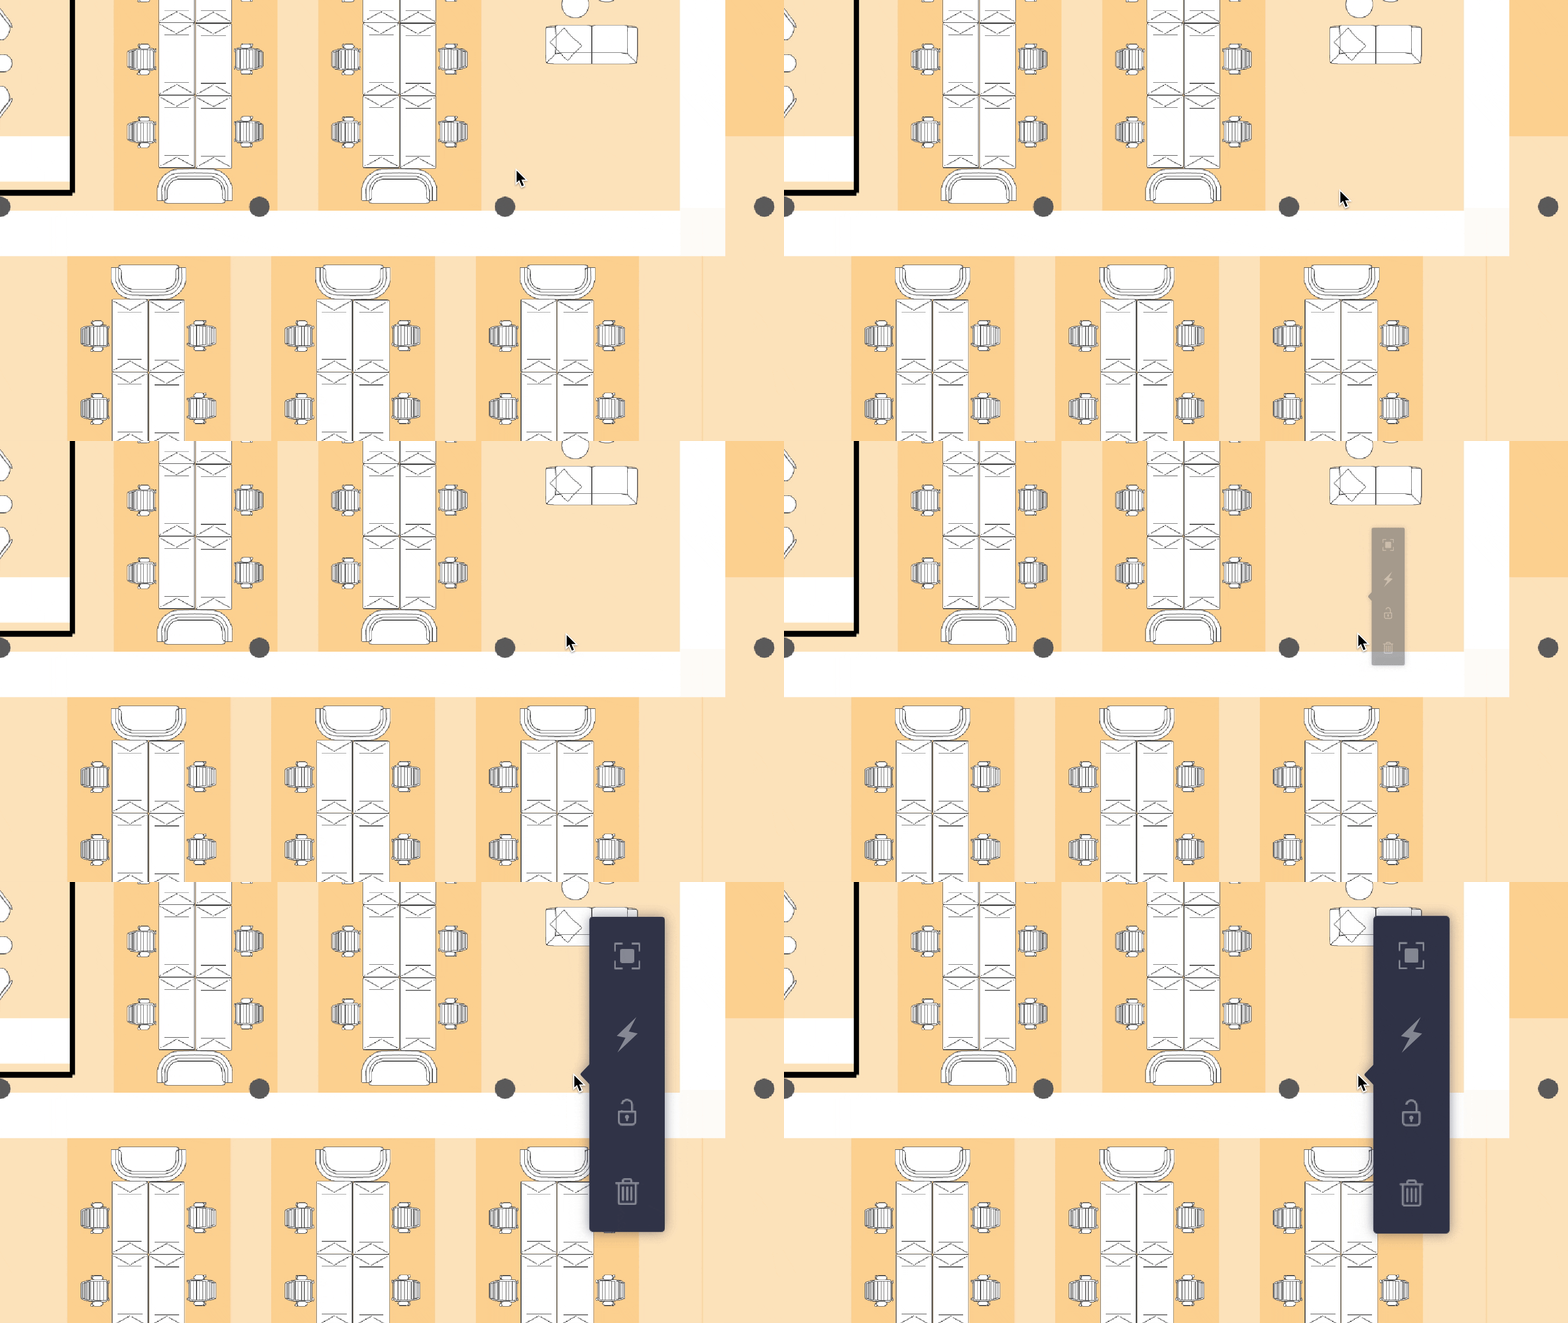
The position and arrangement of the departments is decisive for the success of the floor plan – and even more important: for the satisfaction of the employees. To check and control this, the toolbox offers important tools when clicking on Departments:
1. Zoom on Deparment
With just one click you can enlarge the selected department to window size. This gives you a quick overview of the arrangement of workstations and applications in this specific department.
2. Optimize
CoDesigner allows you to optimize the layout of a single department instead of the entire floor plan.
3. Lock/Unlock
If you are satisfied with the arrangement of a department, you can protect it from being recalculated by clicking the lock icon in the toolbox. If CoDesigner now recalculates the floor plan, the closed department will remain as it is and in the place it is, while the other departments may be placed elsewhere. To include the department in the calculation again, click the lock icon again.
4. Delete
To delete a department click on the delete icon in the toolbox.
If you delete a department in the floor plan, it will also be removed from that floor in Stacking.
At the top is the Servicebar. There you can log in and out. Below this is the header bar with the Haworth and CoDesigner logo on the left and the information which version number of CoDesigner Cloud you are using on the right.
Edit/Delete Applications
When you create or import an Application, CoDesigner uses instances of it according to the specifications or wishes of the departments and teams at vacant positions in the floor plan. Any edits you make to the Application will sync to any instances of it in your floor plan.
There are two ways to edit an application. Find it in the overview of the Applicationbuilder or use the toolbox to go directly to the application:
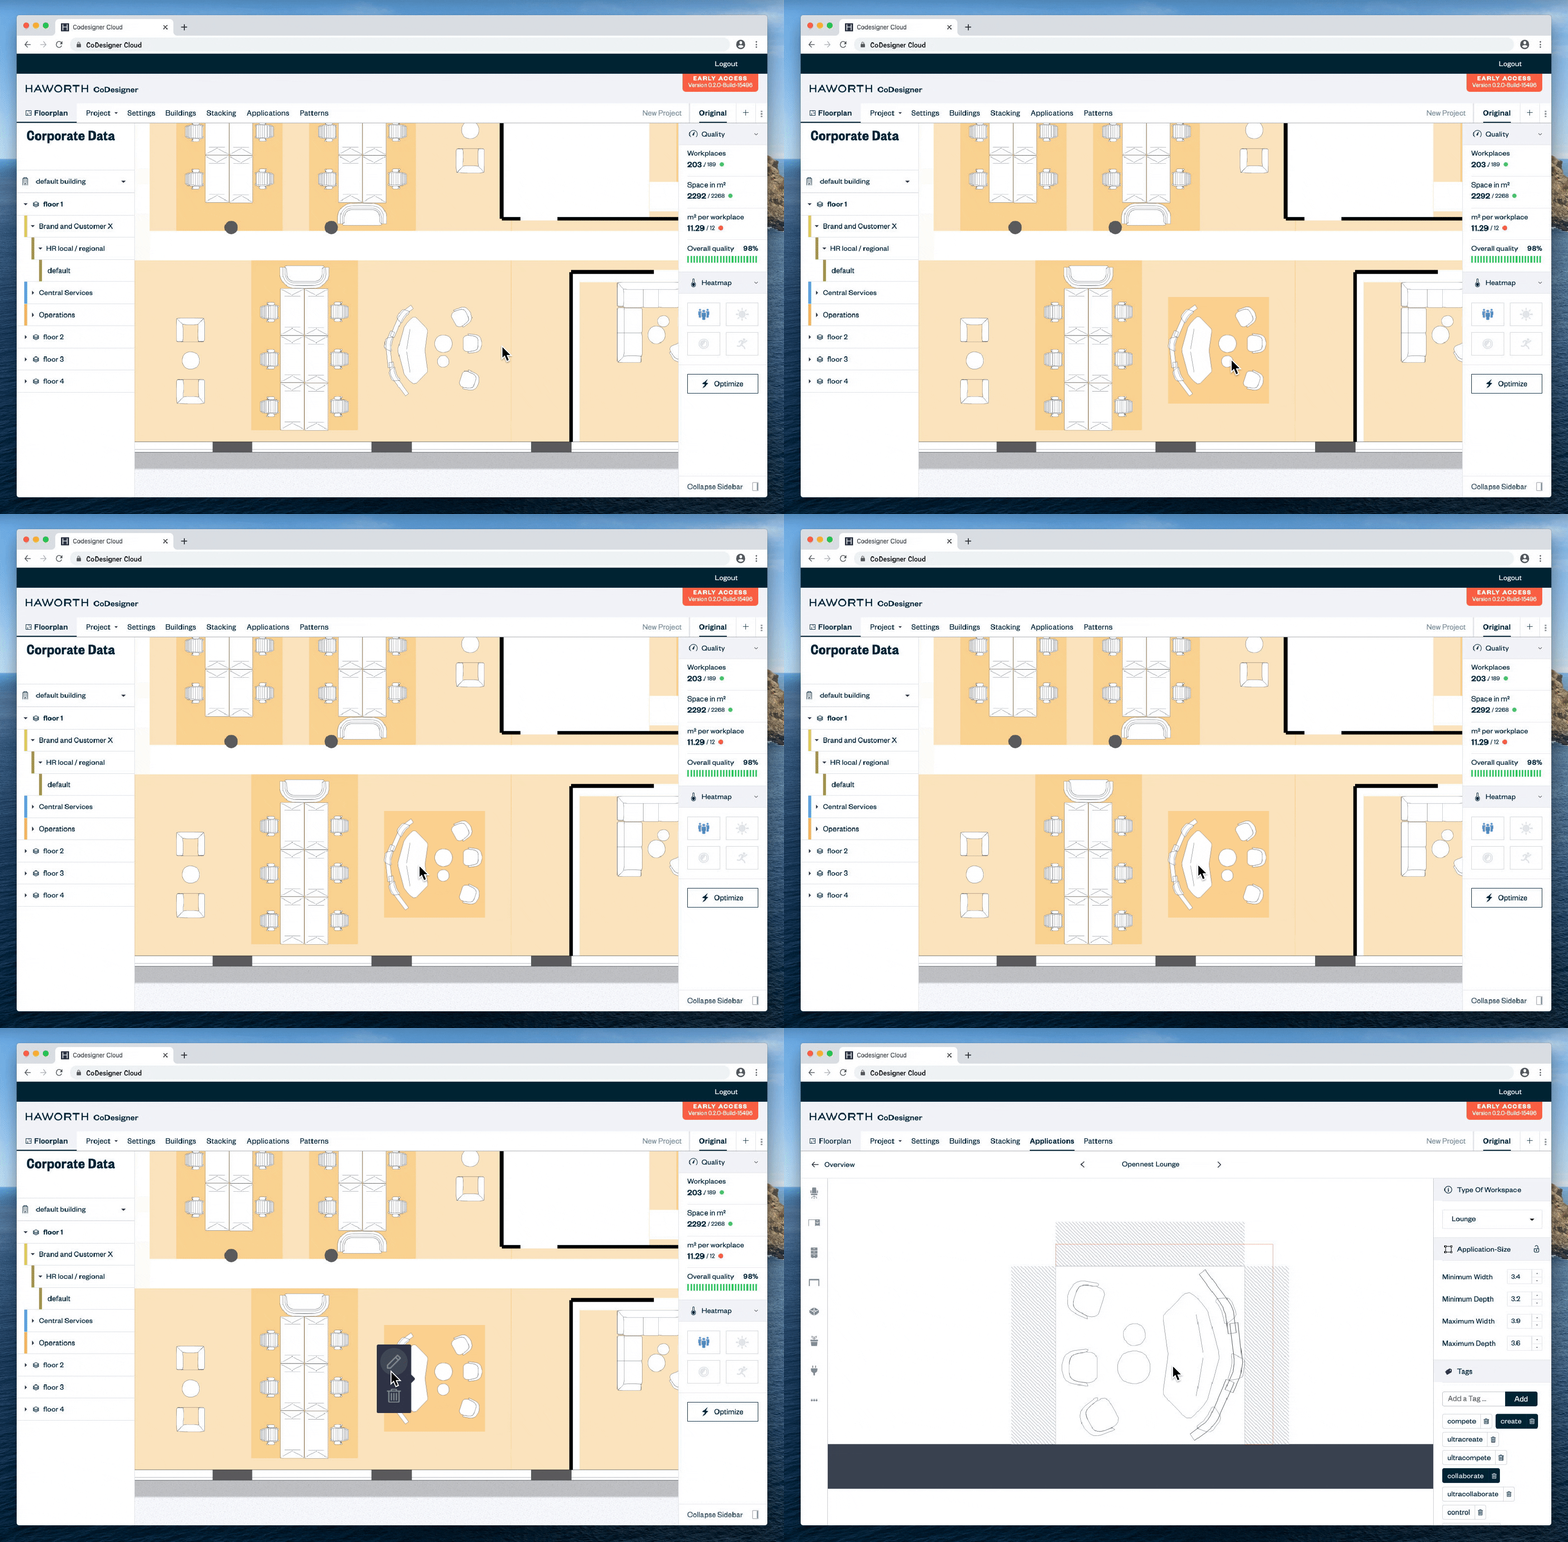
When you have made your changes, save the application and go back to the floorplan to see your changes there.
Place Markers
Markers are points of attraction (so-called “Attractors”) – which you can add to the floor plan manually at zones (learn more) or outside the floorplan. With the help of the markers you can define where in the floor plan e.g. the cafeteria will be located. Adjacencies (learn more) can be used to create a connection between a department and a certain marker, which will cause CoDesigner to place the department in the floor plan as close as possible to that marker.
To add a marker, click with the right button of the mouse outside or on a zone inside the floor plan. At this point the toolbox with the marker symbol appears. This is where the marker will appear later.
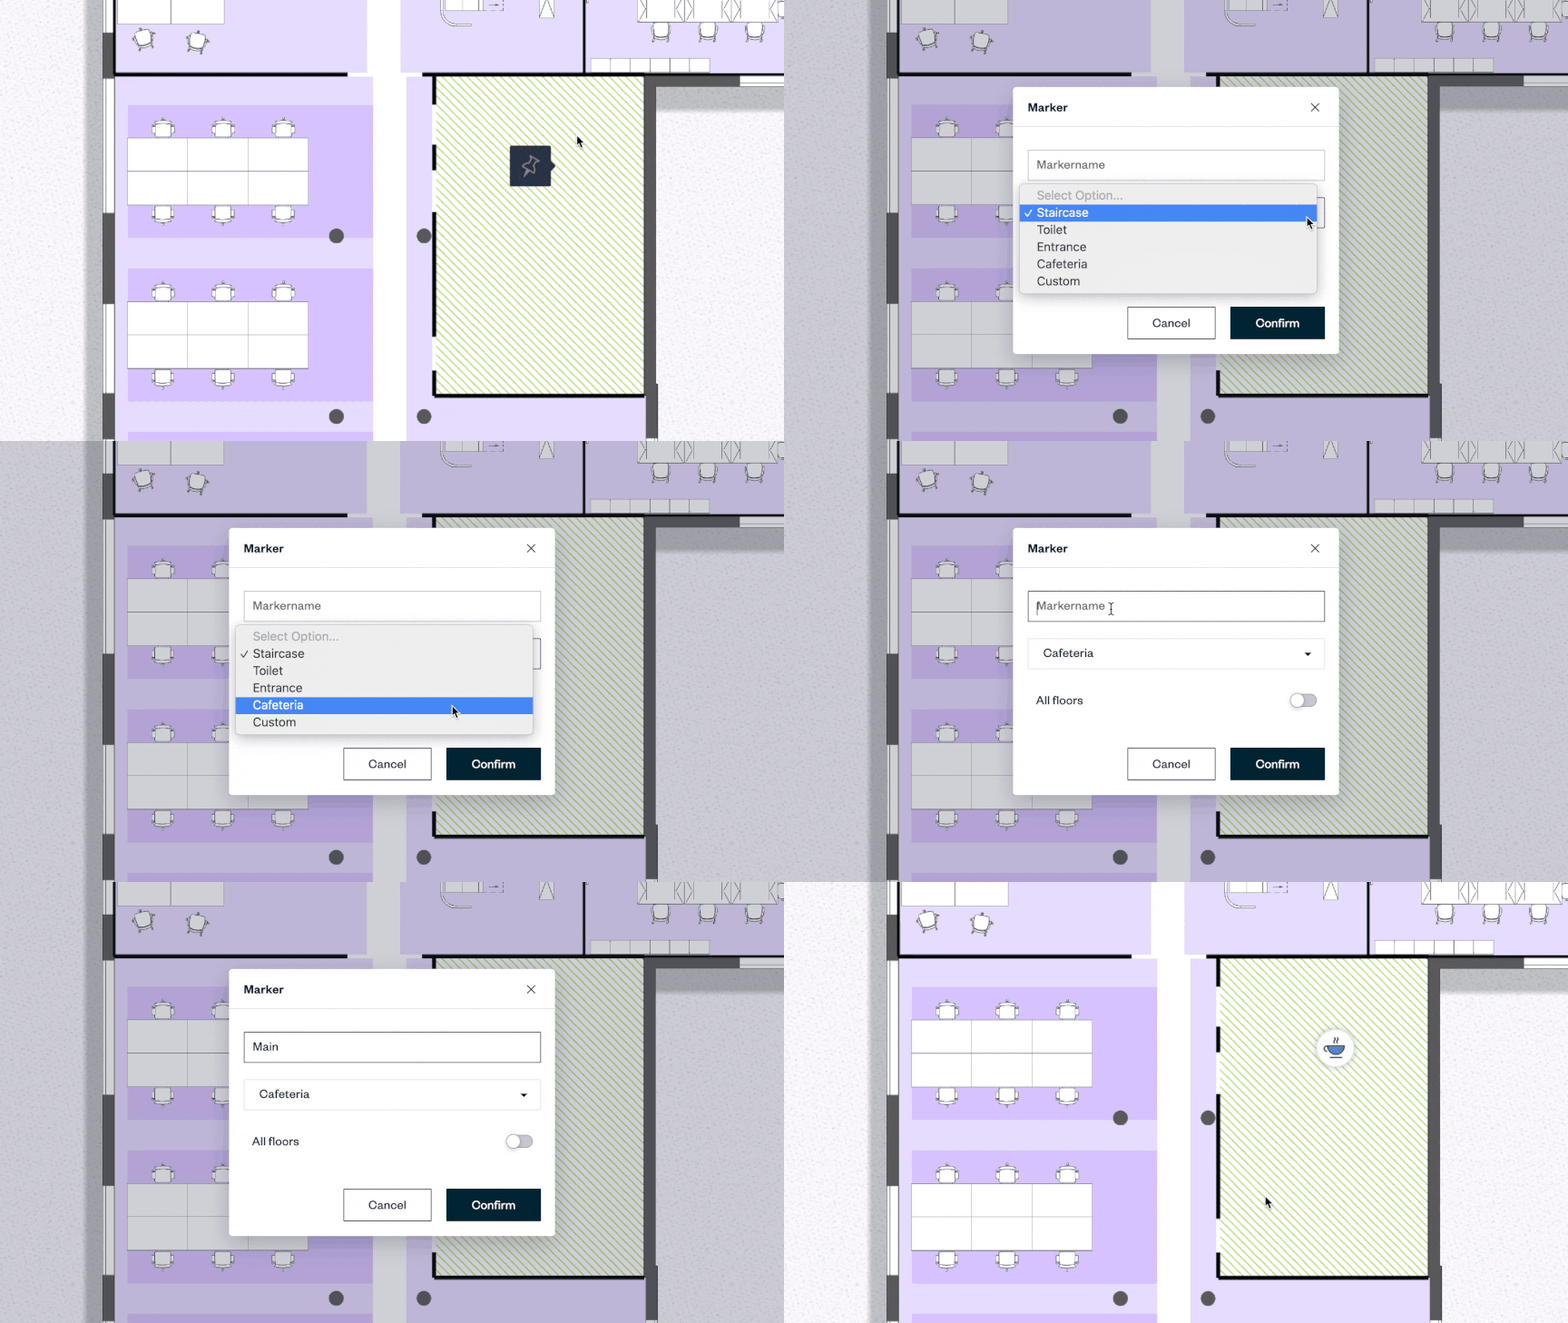
After clicking on the marker symbol, a new window will appear where you can choose which type of marker you want to create: Staircase, Toilet, Entrance, Cafeteria or Custom. Use Custom if the others do not meet your needs. Now the marker only needs a unique name. And that’s it. The marker now appears at the desired position.
Edit/Delete Marker
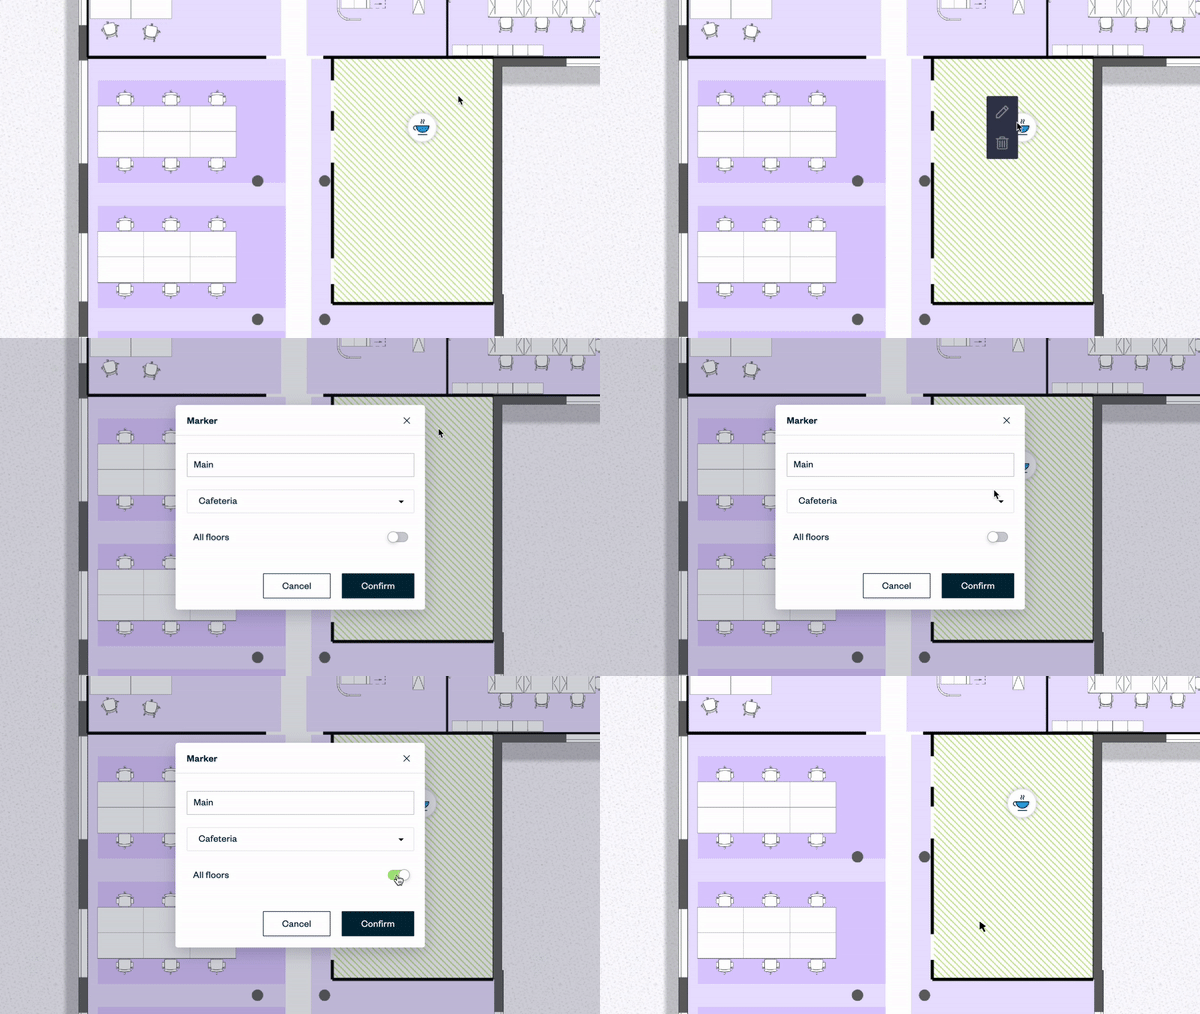
To edit or delete the marker, right-click on the marker itself, which will open the Toolbox again – but now with two other tools: Edit and Delete. If you click on the edit icon, the window opens again where you can change the name, the species or define the marker to be on all floors (see below). To delete the marker, just click on the delete icon in the toolbox.
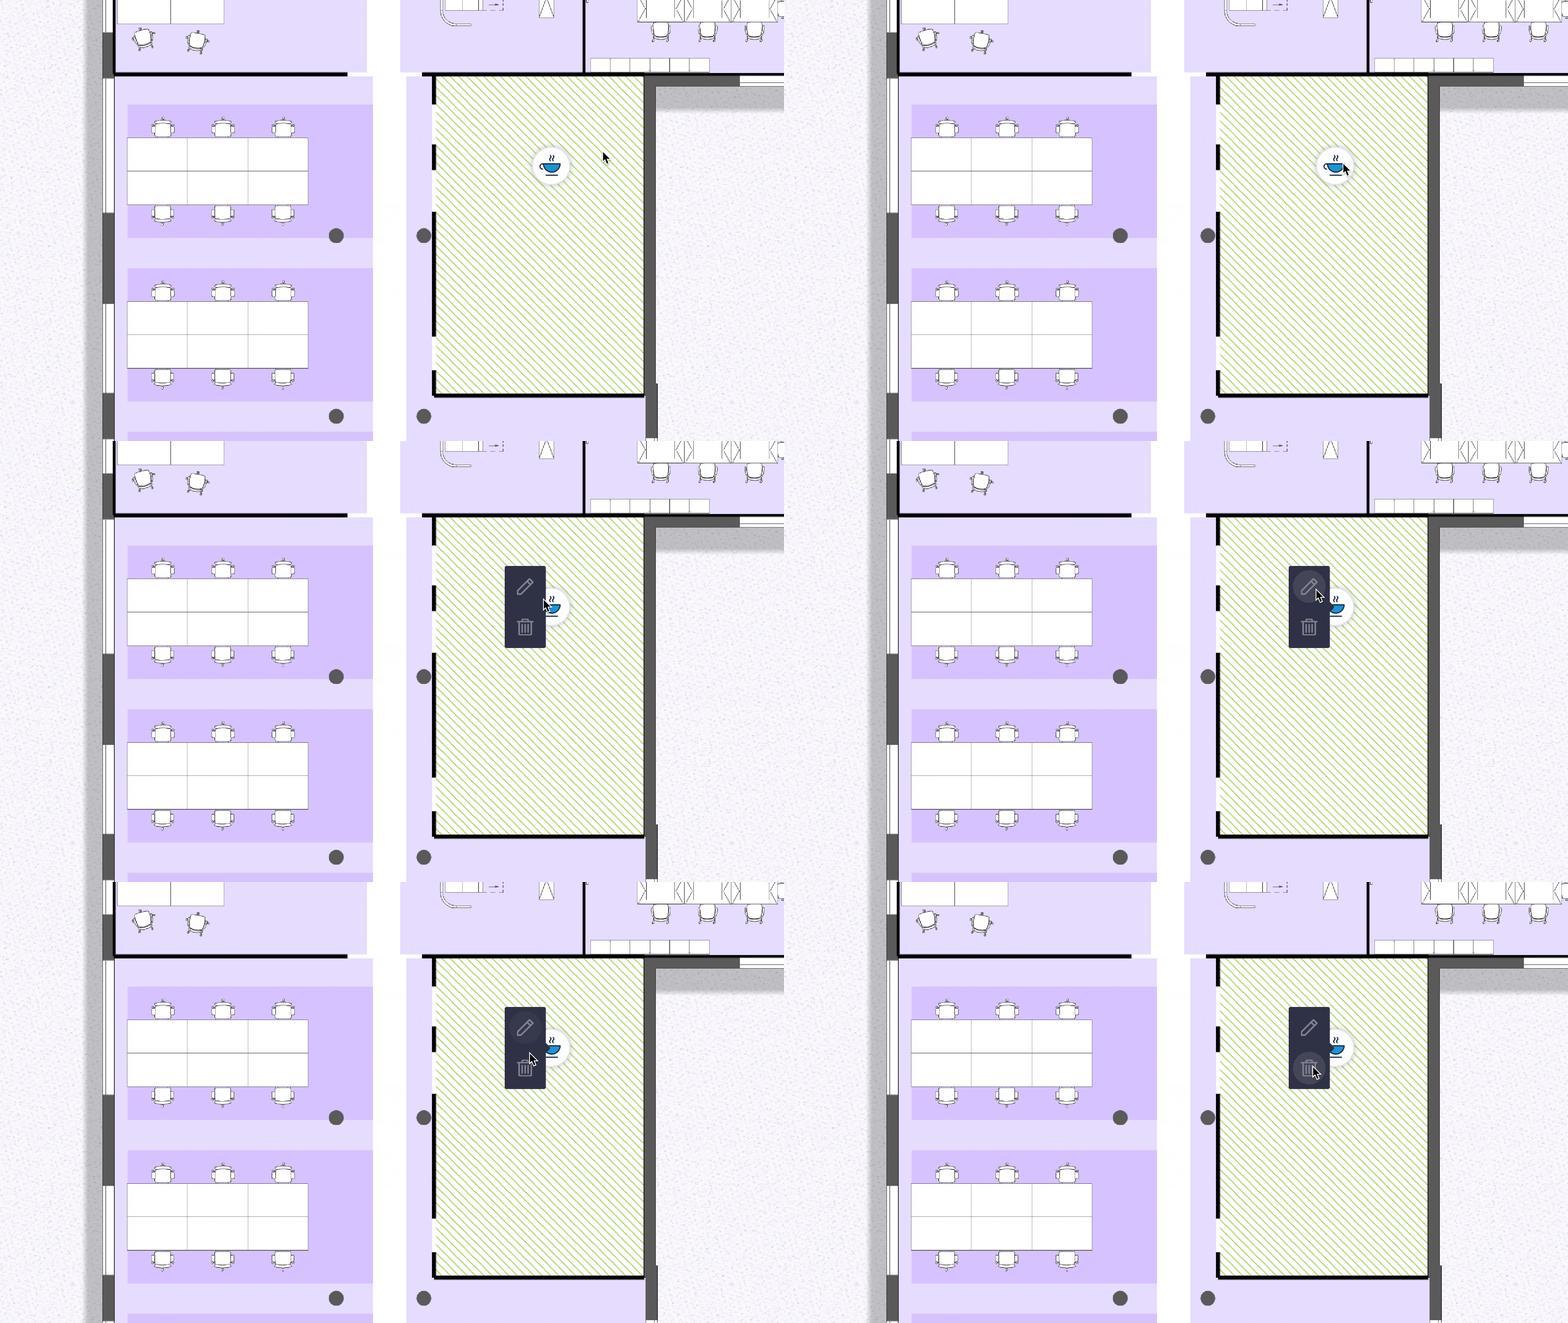
Marker on all Floors
If you plan several floors and want the marker to appear at the same place on all floors, right click on the marker again, open the edit window and activate it there. This way you don’t have to switch to each floor and create the marker each time.
